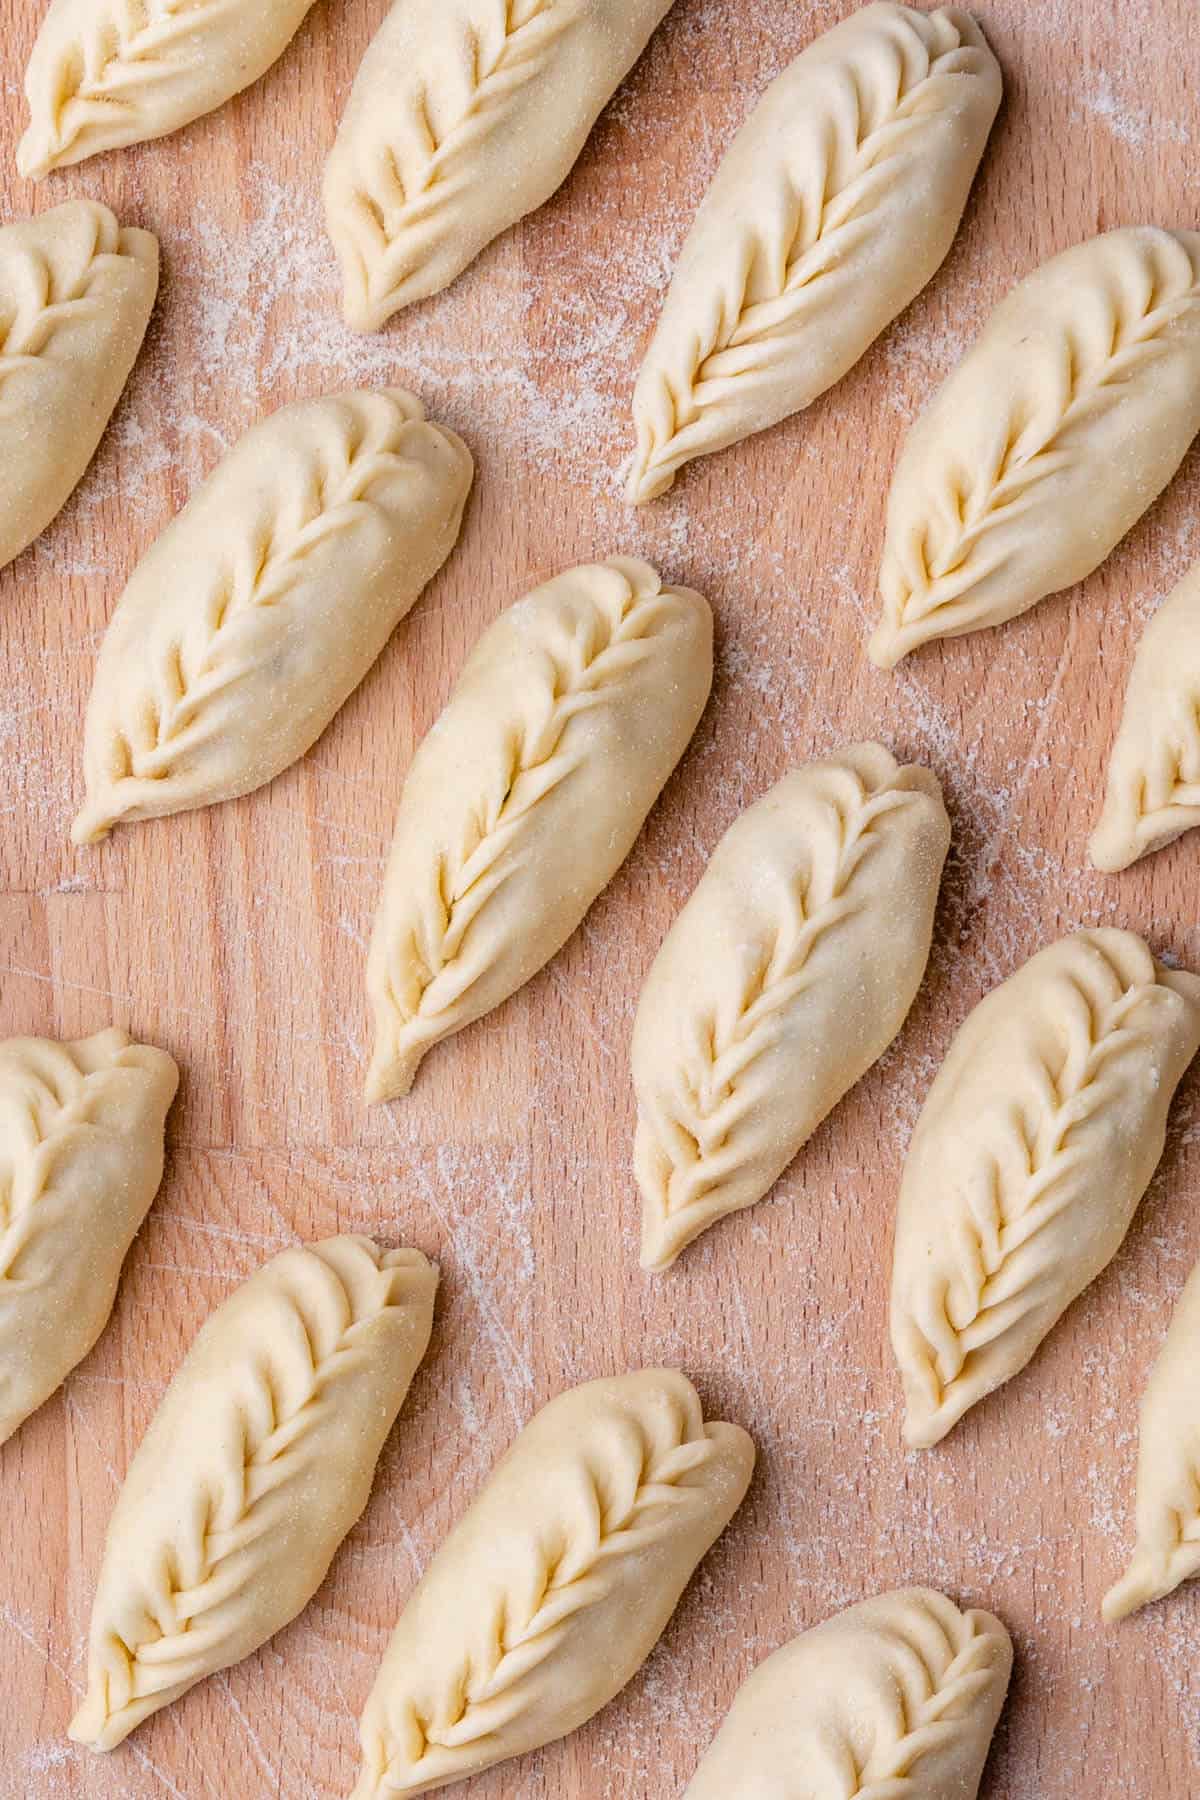
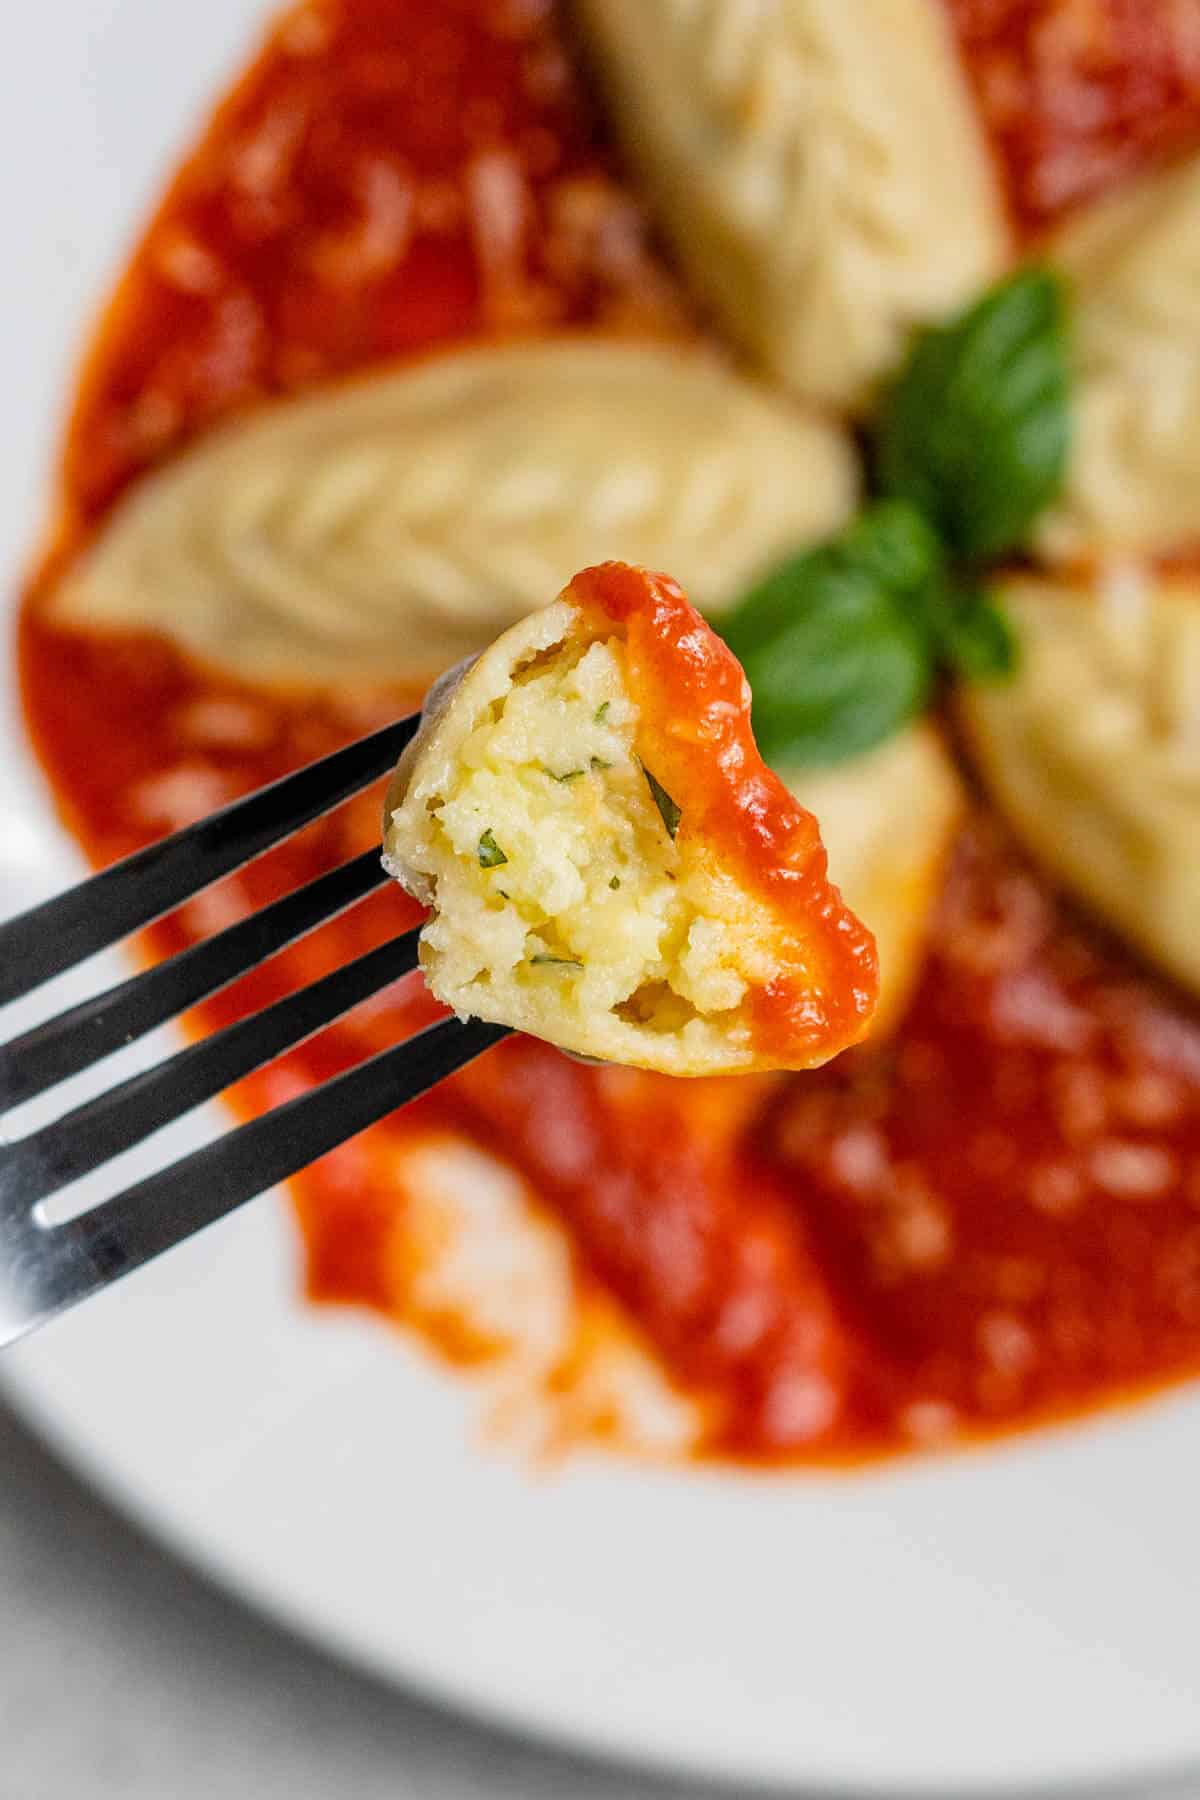
Culurgiones are a traditional Sardinian pasta dish stuffed with a potato, pecorino cheese, and mint filling. With their unique and beautiful handmade closure design, they are almost too pretty to eat!
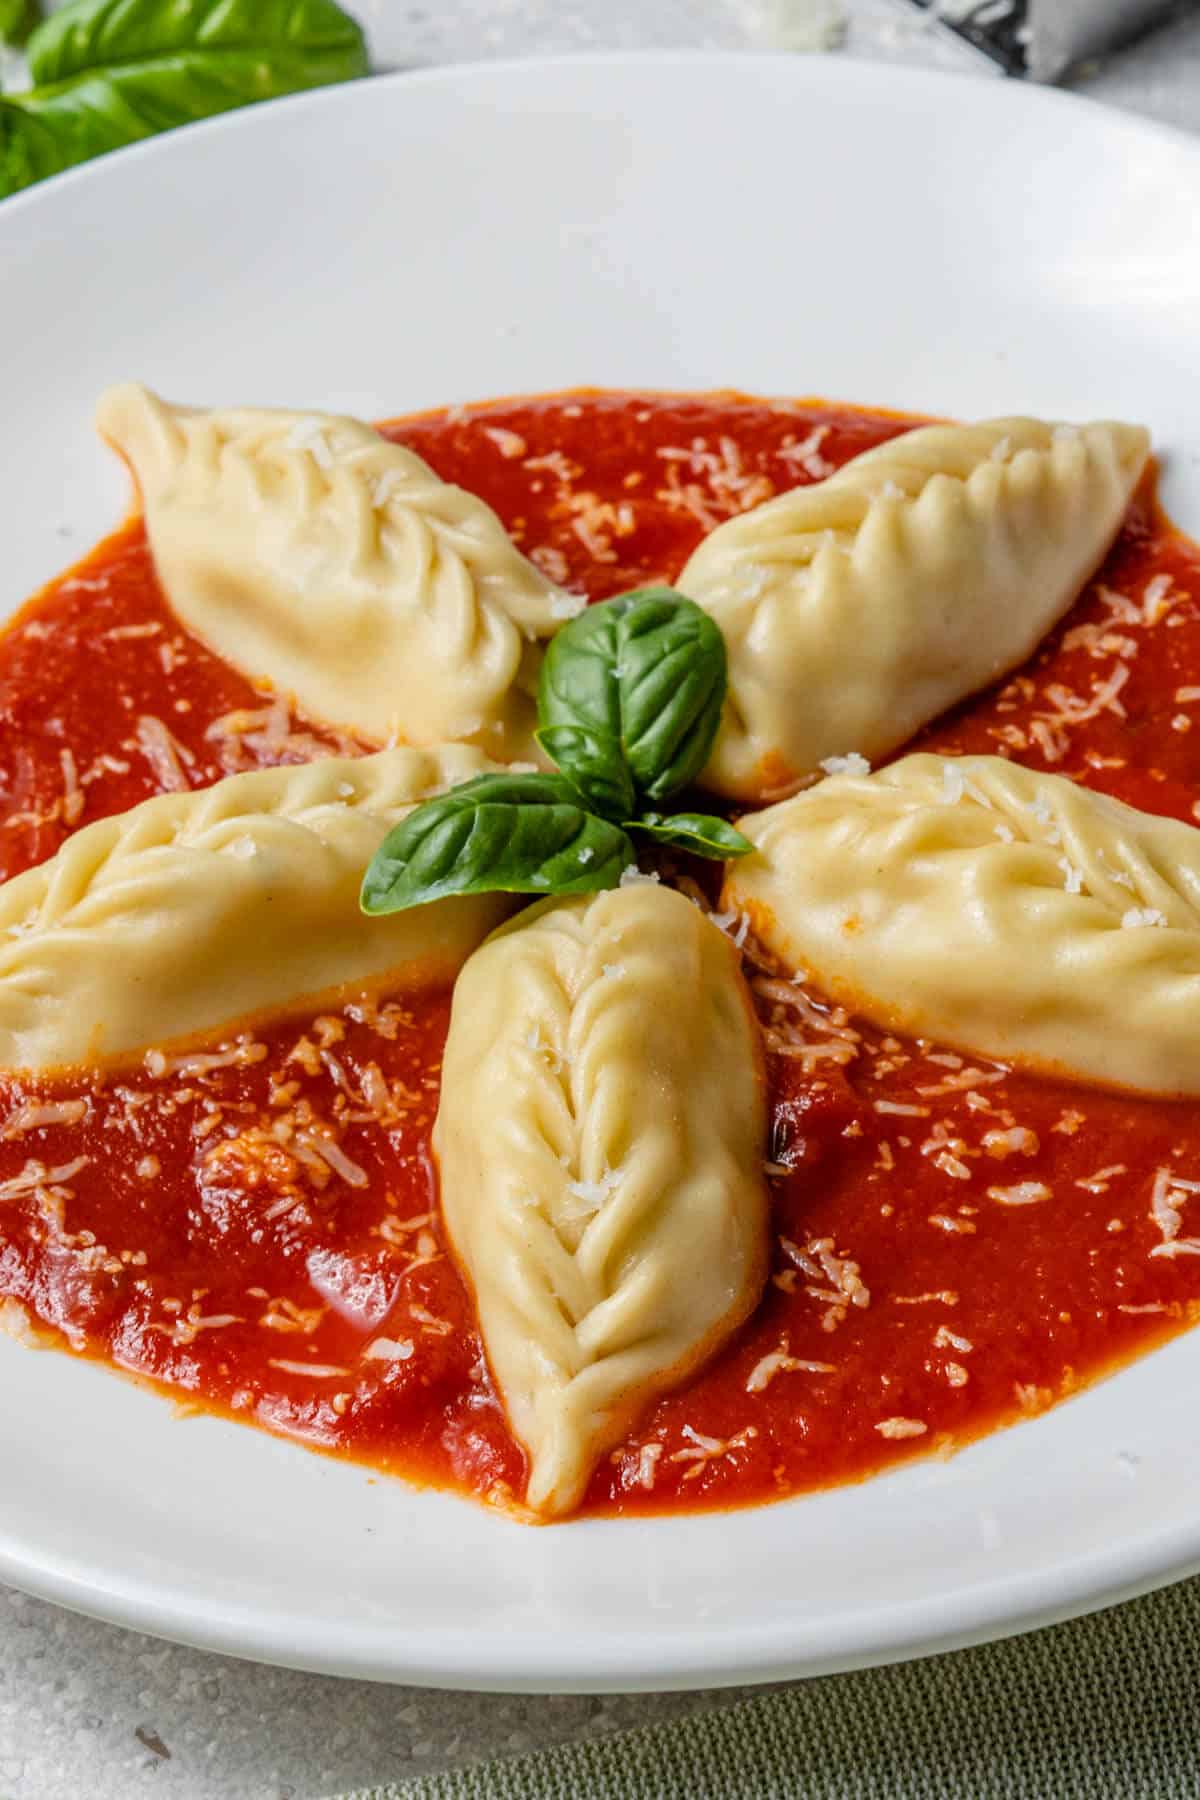
What I love about Italy is that every different city specializes in their own traditional pasta dish. Culurgiones are from Ogliastra, which is a province on the east coast of Sardegna. I feel blessed to have been able to learn how to make this classic pasta from four different Italian ladies, all of which had their own personal folding technique passed through their families.
Sardinian Culurgiones are similar to ravioli or dumplings with a special handmade fold. Inside, there is a mixture which is made from mashed potatoes, mint, and pecorino cheese. Pecorino Sardo that is….. which is pecorino cheese that's made in Sardinia and is a little milder in taste than Pecorino Romano.
They are then boiled and served over a simple Tomato Sauce and taste like pillows from heaven!
Another traditional Sardinian pasta I have also shared is Malloreddus also known as Gnocchetti, with no fancy equipment needed and is super easy to make.
Culurgiones is a definitely labour of love, so roll up your sleeves as I'm going to show you how to make them step by step 🙂
Table of Contents
Why you'll love this recipe
- Naturally Vegetarian. Ingredients of wheat flour and a filling of potatoes and cheese, culurgiones are a healthy vegetarian meal option
- A Taste of Sardinia. Culurgiones are a staple of Sardinian cuisine, where you won't find anywhere. So by making culurgiones, you'll get to experience a taste of Sardinia without leaving your own kitchen
- Versatile and Adaptable. You can enjoy culurgiones in a variety of ways, with a simple tomato sauce, a sage infused oil or butter sauce or deep fried and dipped into a pecorino cream. Yum, yum and yum!
Ingredients and Substitutions
- Semolina flour which is made from durum wheat, is the base of the pasta dough. Mixed with room temperature water, these are the only ingredients required to make the fresh pasta dough. You don't even need to add any salt
- Red potatoes are the preferred potato to use for the filling as they are less watery on the inside. Its best also not to peel them before cooking. If you cant find red potatoes, you can still also use white potatoes
- Pecorino cheese is the traditional cheese to make Culurgiones. It's also usually with pecorino Sardo, which is pecorino cheese from Sardinia and has a much milder taste. The type of pecorino Sardo used is Semi Stagionato, which means semi aged cheese. If you can't find this, not to worry, as classic pecorino is fine to use
- Fresh mint leaves make part of the potato filling for its signature flavor. Dried menta leaves is a good substitute if you don't have fresh herbs
- Extra virgin olive oil and a minced garlic clove are part of the filling. You don't want a bold garlicy flavor so one clove is sufficient to use. I personally prefer to use a garlic infused olive oil for an even milder taste
- Italian tomato sauce, simply made with a few garlic cloves and tomatoes, is the traditional sauce to serve culurgiones with. It's also common to see them served with a simple butter or olive oil sauce infused with sage leaves
How to make Sardinian Culurgiones
With just a few simple ingredients and easy preparation, you can make Sardinian Culurgiones in your own kitchen with these easy to follow steps.
Potato filling
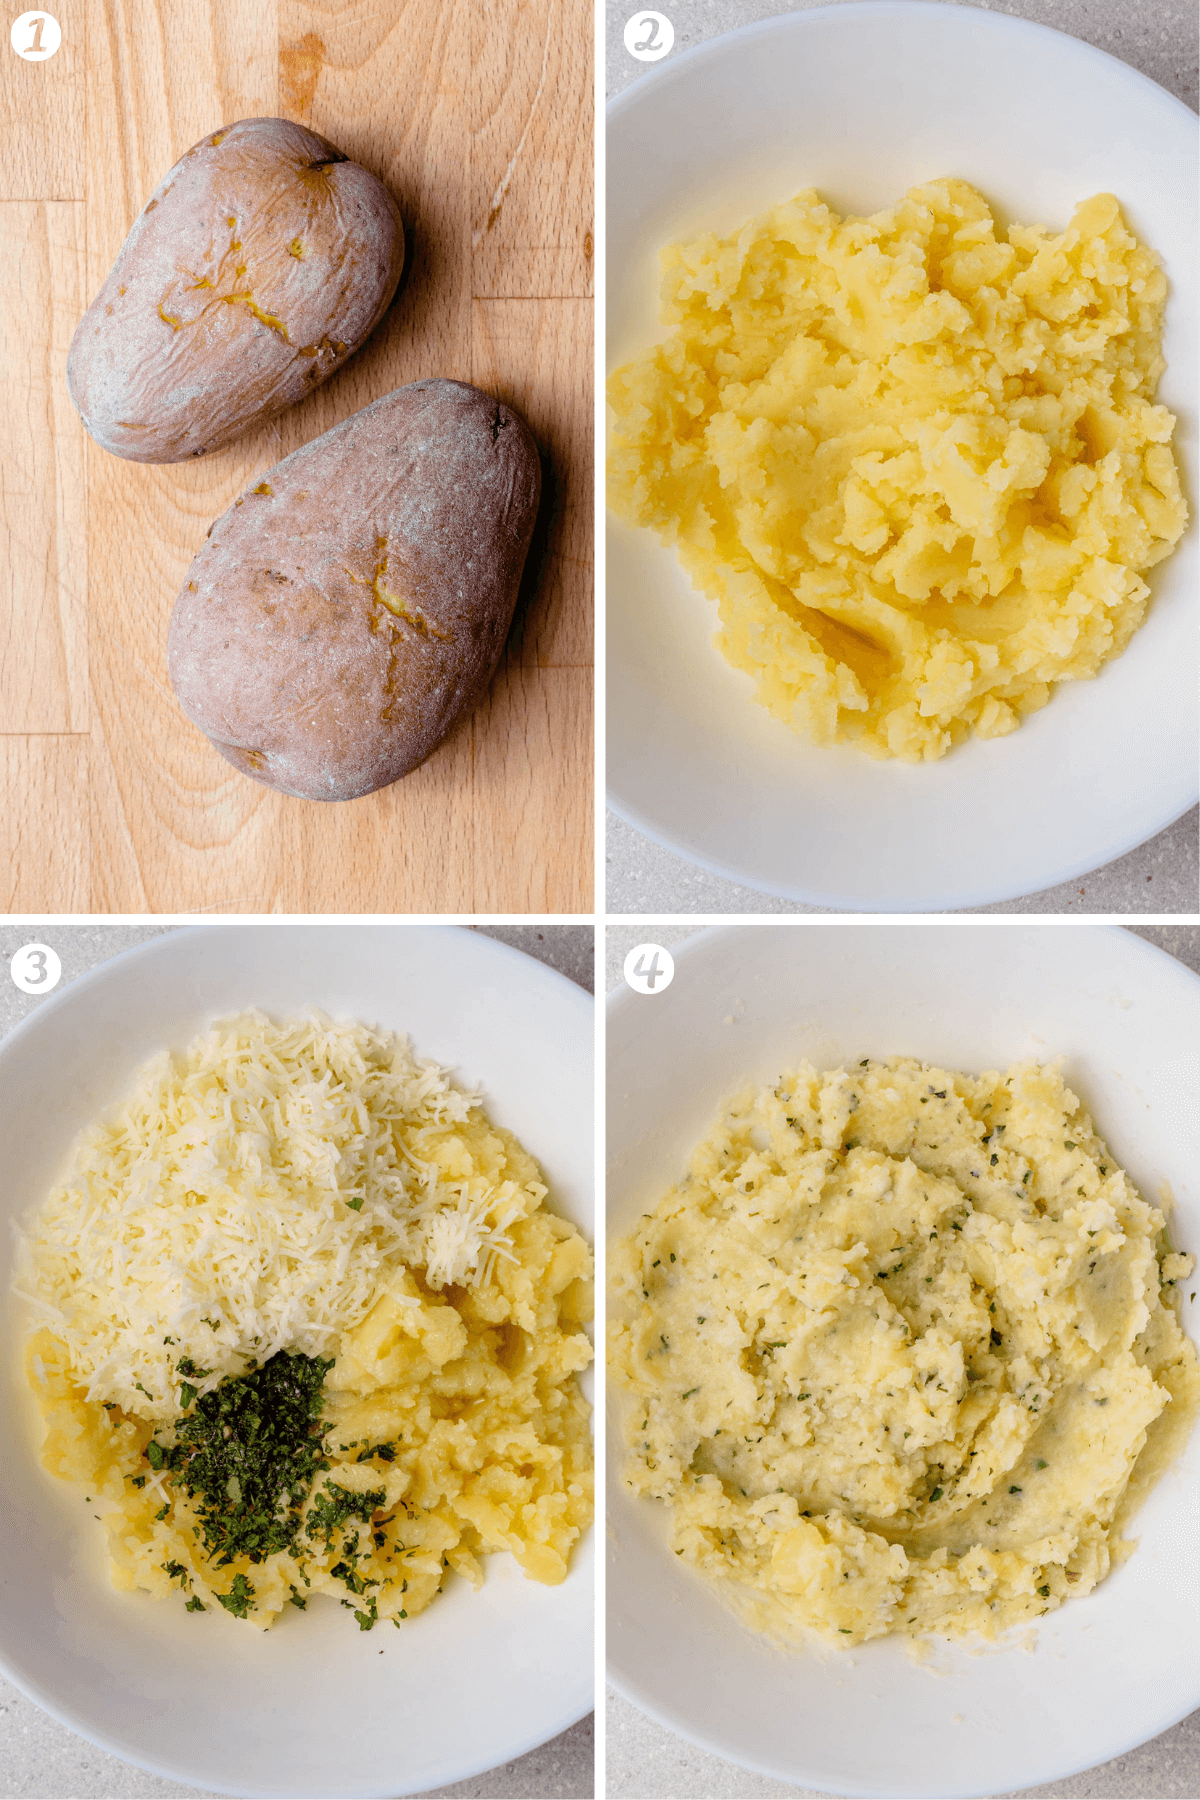
- Boil potatoes with the skin on
- Once cooked, peel and mash in a bowl
- Add finely chopped mint leaves, pecorino cheese, garlic, olive oil and salt
- Mix to combine and taste for seasoning
Prepare dough
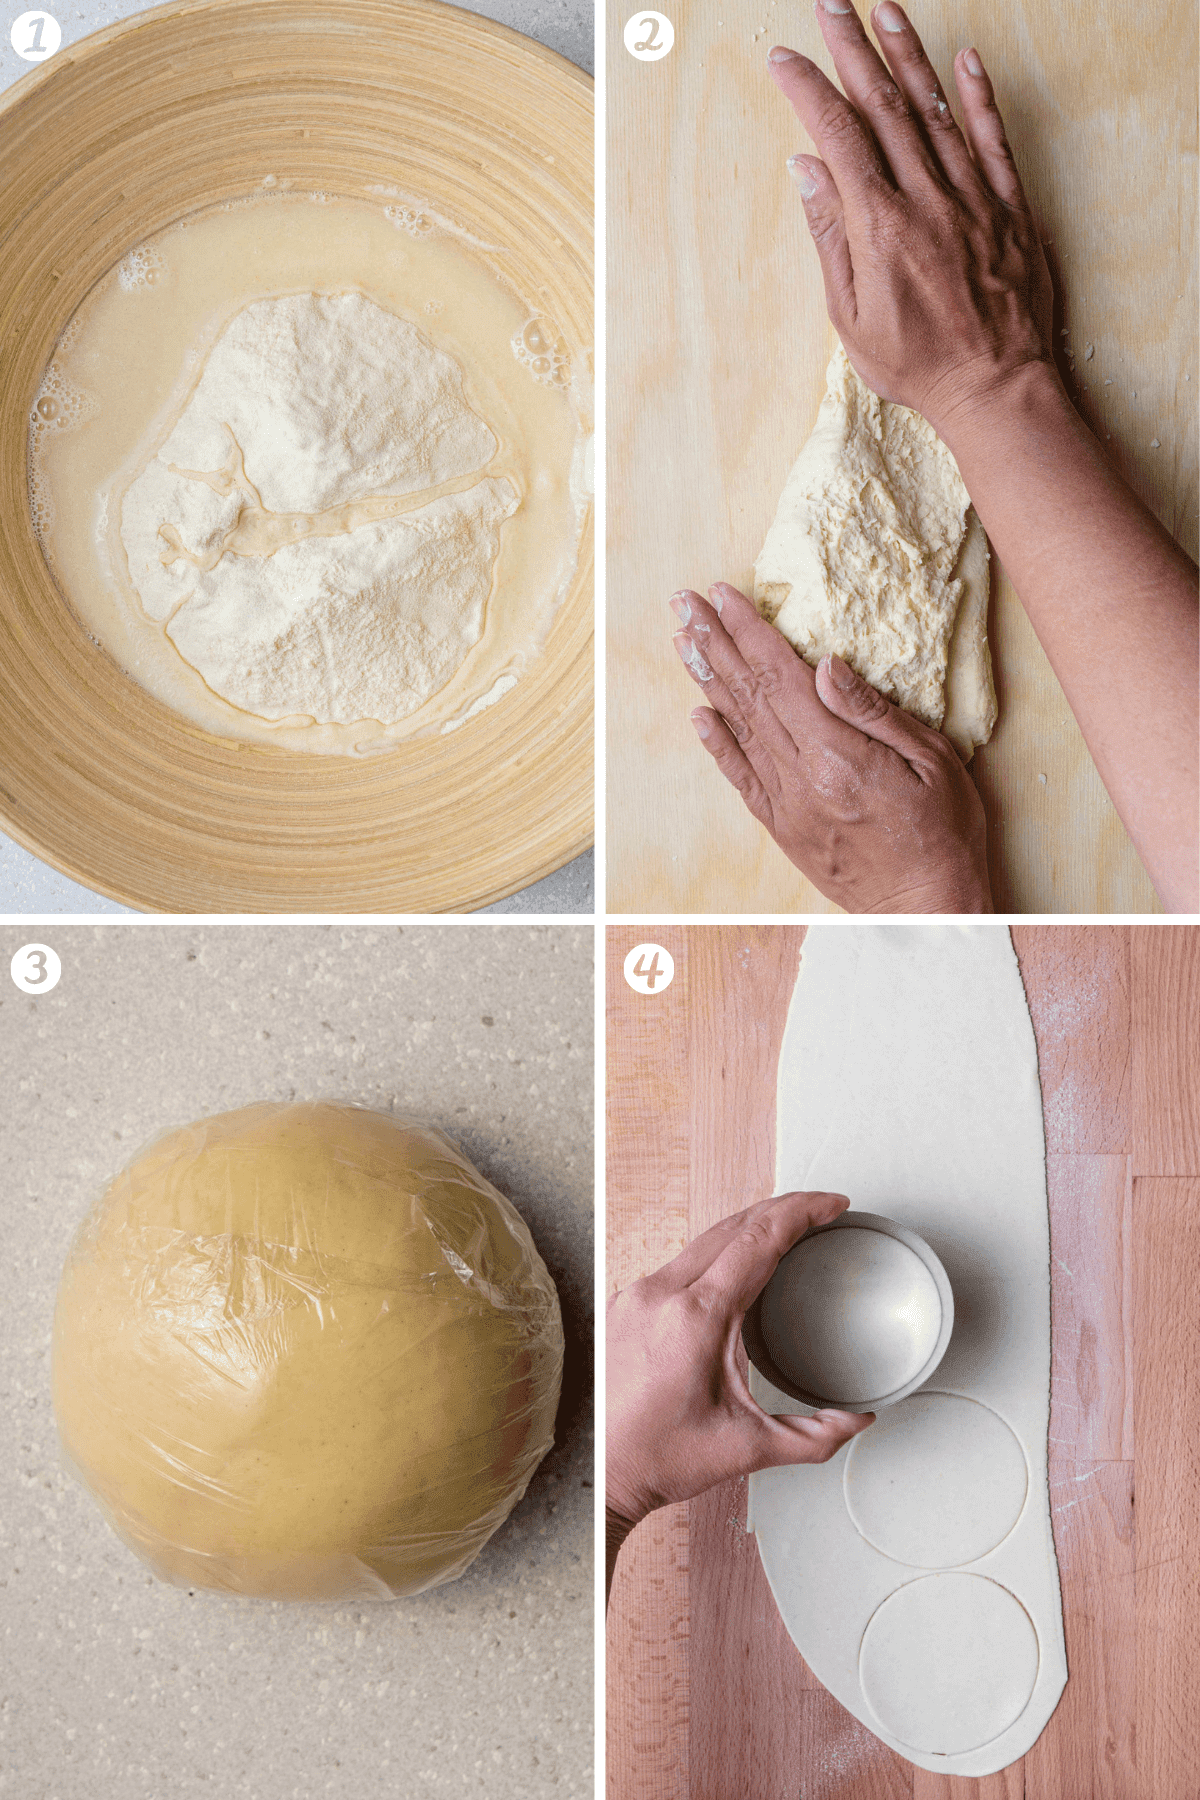
- In a bowl add semolina flour and slowly pour in water, stirring it at the same time. Continue mixing until combined together
- Transfer to a clean table and knead for about 10 minutes to achieve a smooth consistency
- Wrap in plastic wrap and let it rest for 20 minutes
- Cut a piece off the dough and put it through a pasta machine to roll a flat sheet (about 1mm thickness). You can also use a rolling pin. Then using a round cookie cutter 8 cm in diameter, cut out round circles (as pictured)
Make Culurgiones
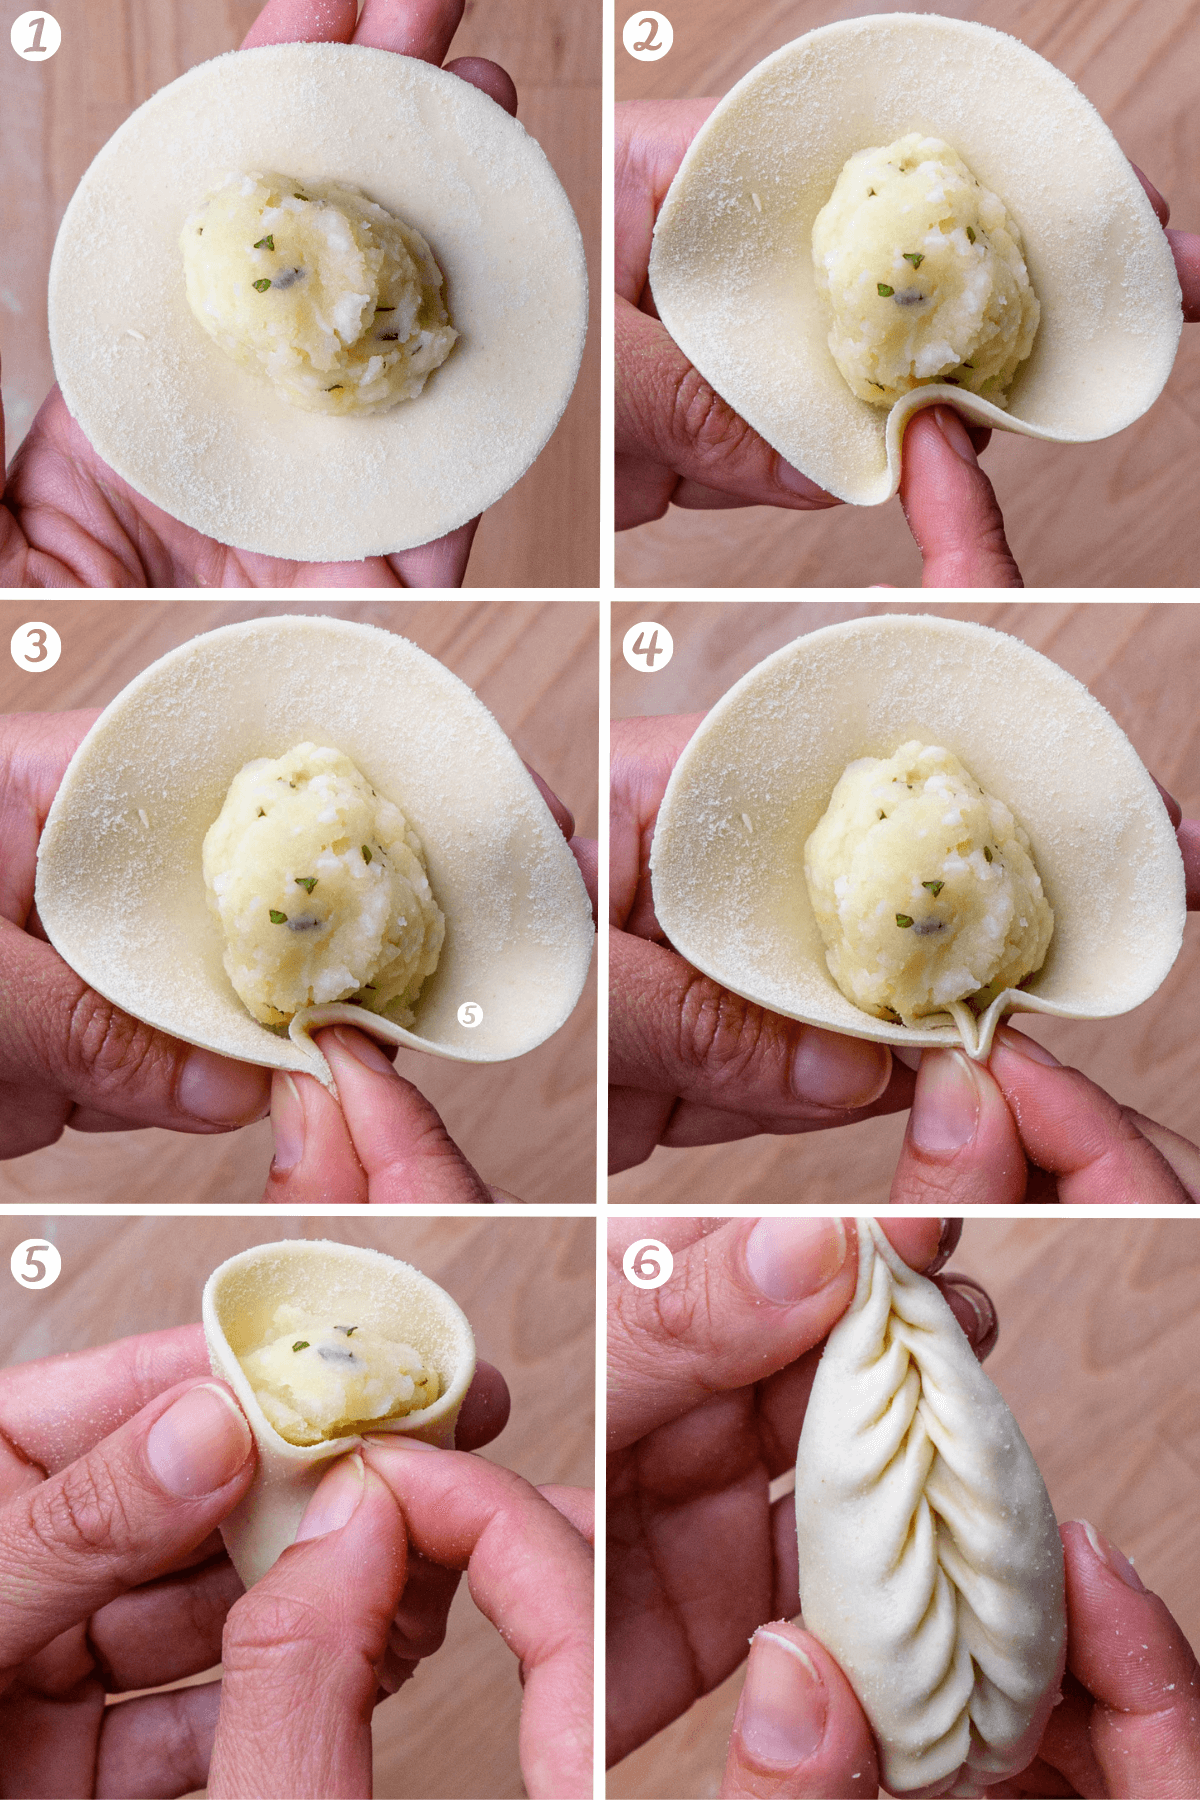
- To make the culurgiones, take one pasta circle and place in your hand. Then place a heaped teaspoon of the potato mixture in the center
- Use your index finger to push the pasta gently towards the filling
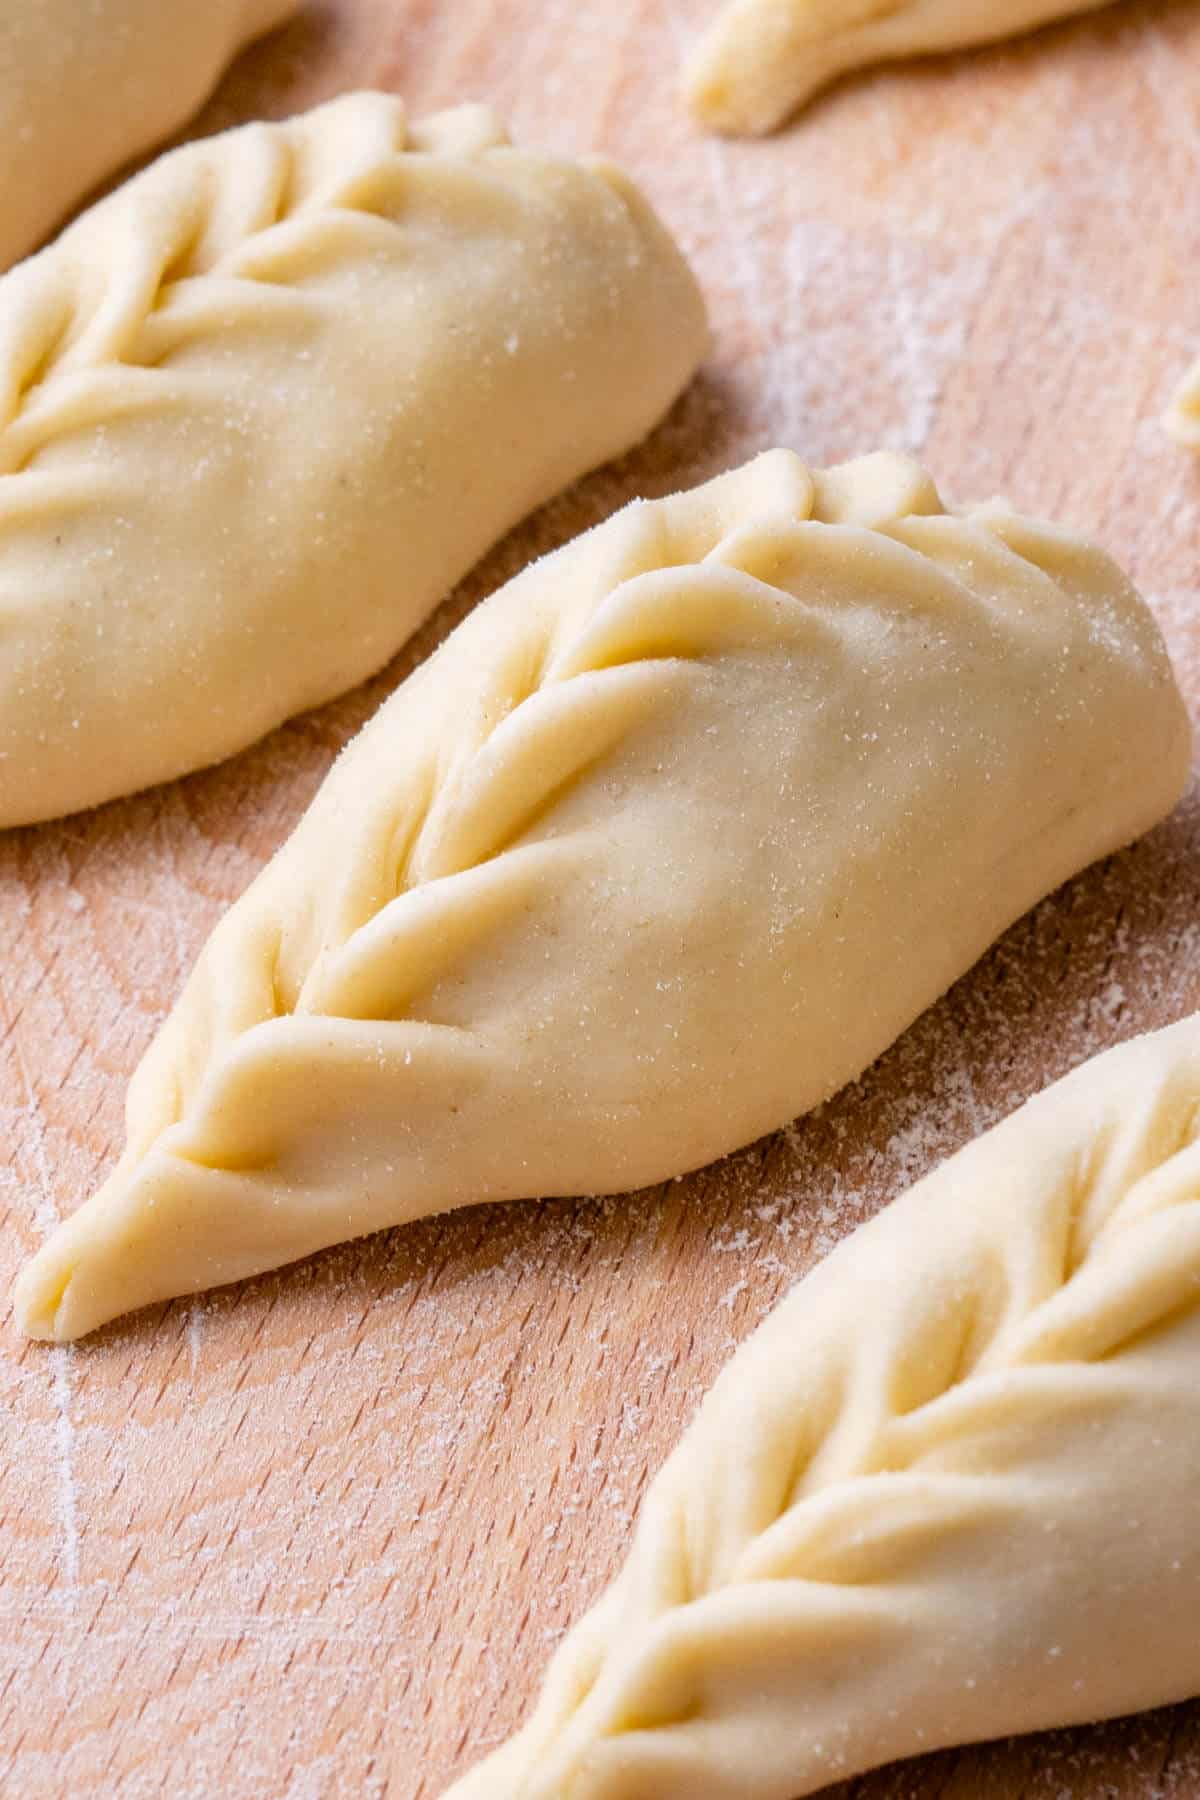
- Fold the left side of the pasta over to the center and pinch it lightly to seal
- Repeat with the right side, folding it over to the center and pinch lightly to seal
- Continue this process with left and right folds and pinching lightly to seal each time
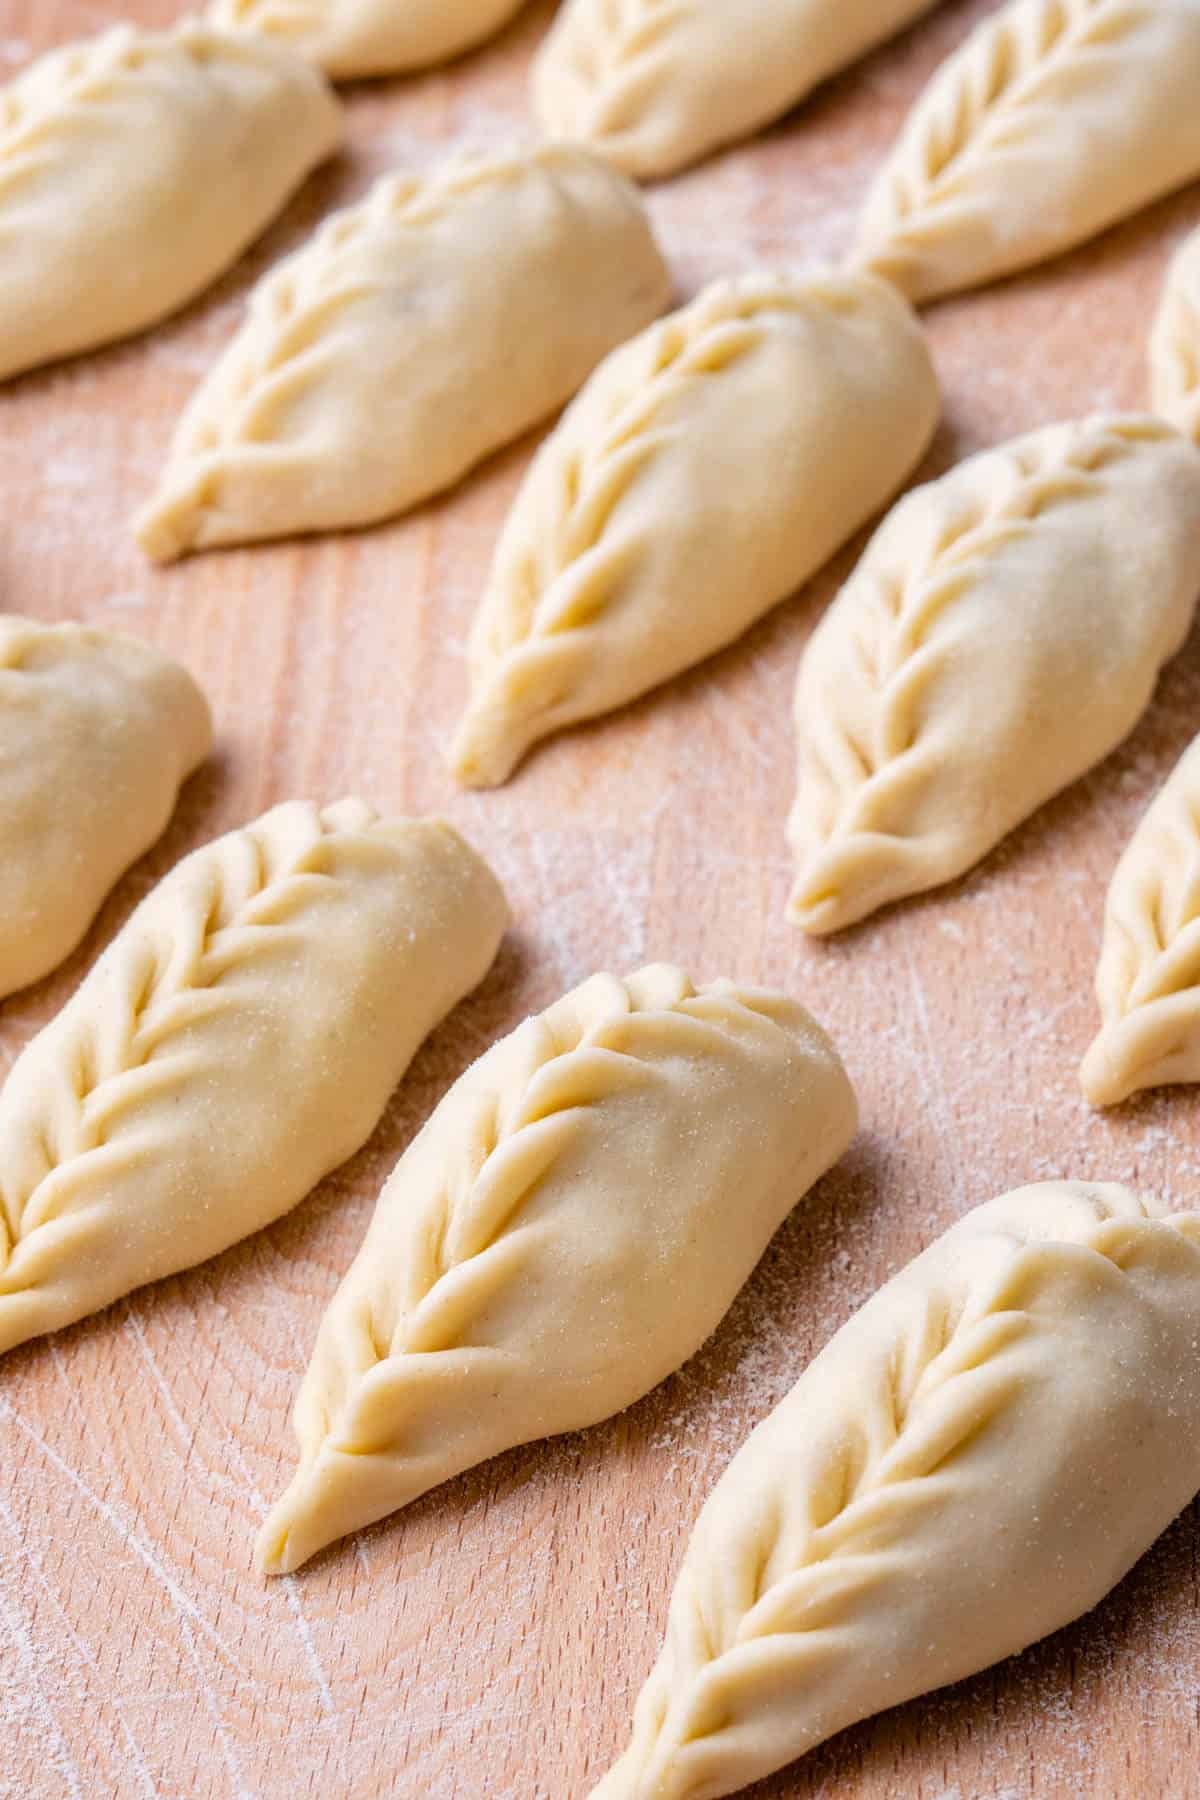
- At the end, pinch the tip and you will have the unique culurgiones shape. Repeat with the remaining pasta circles and filling
Cook culurgiones
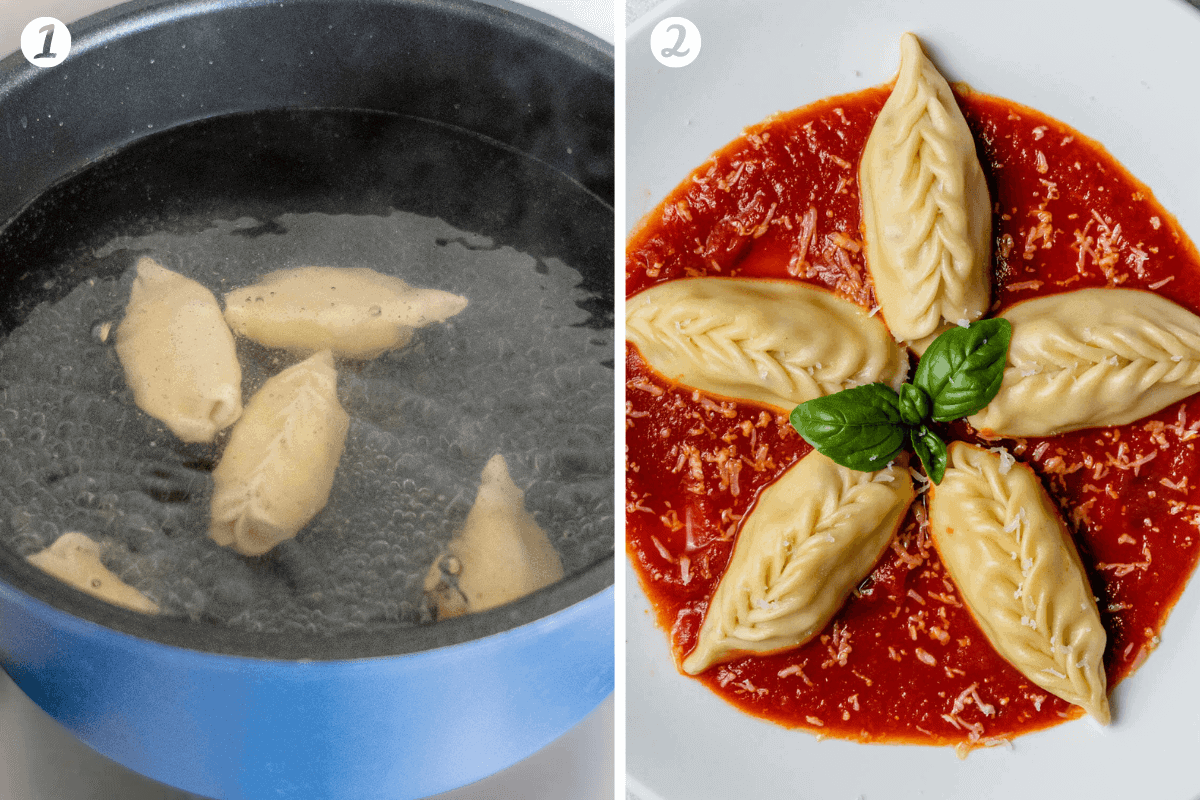
- In a pot of boiling water, add sea salt then carefully drop in the culurgiones and cook for 5 minutes
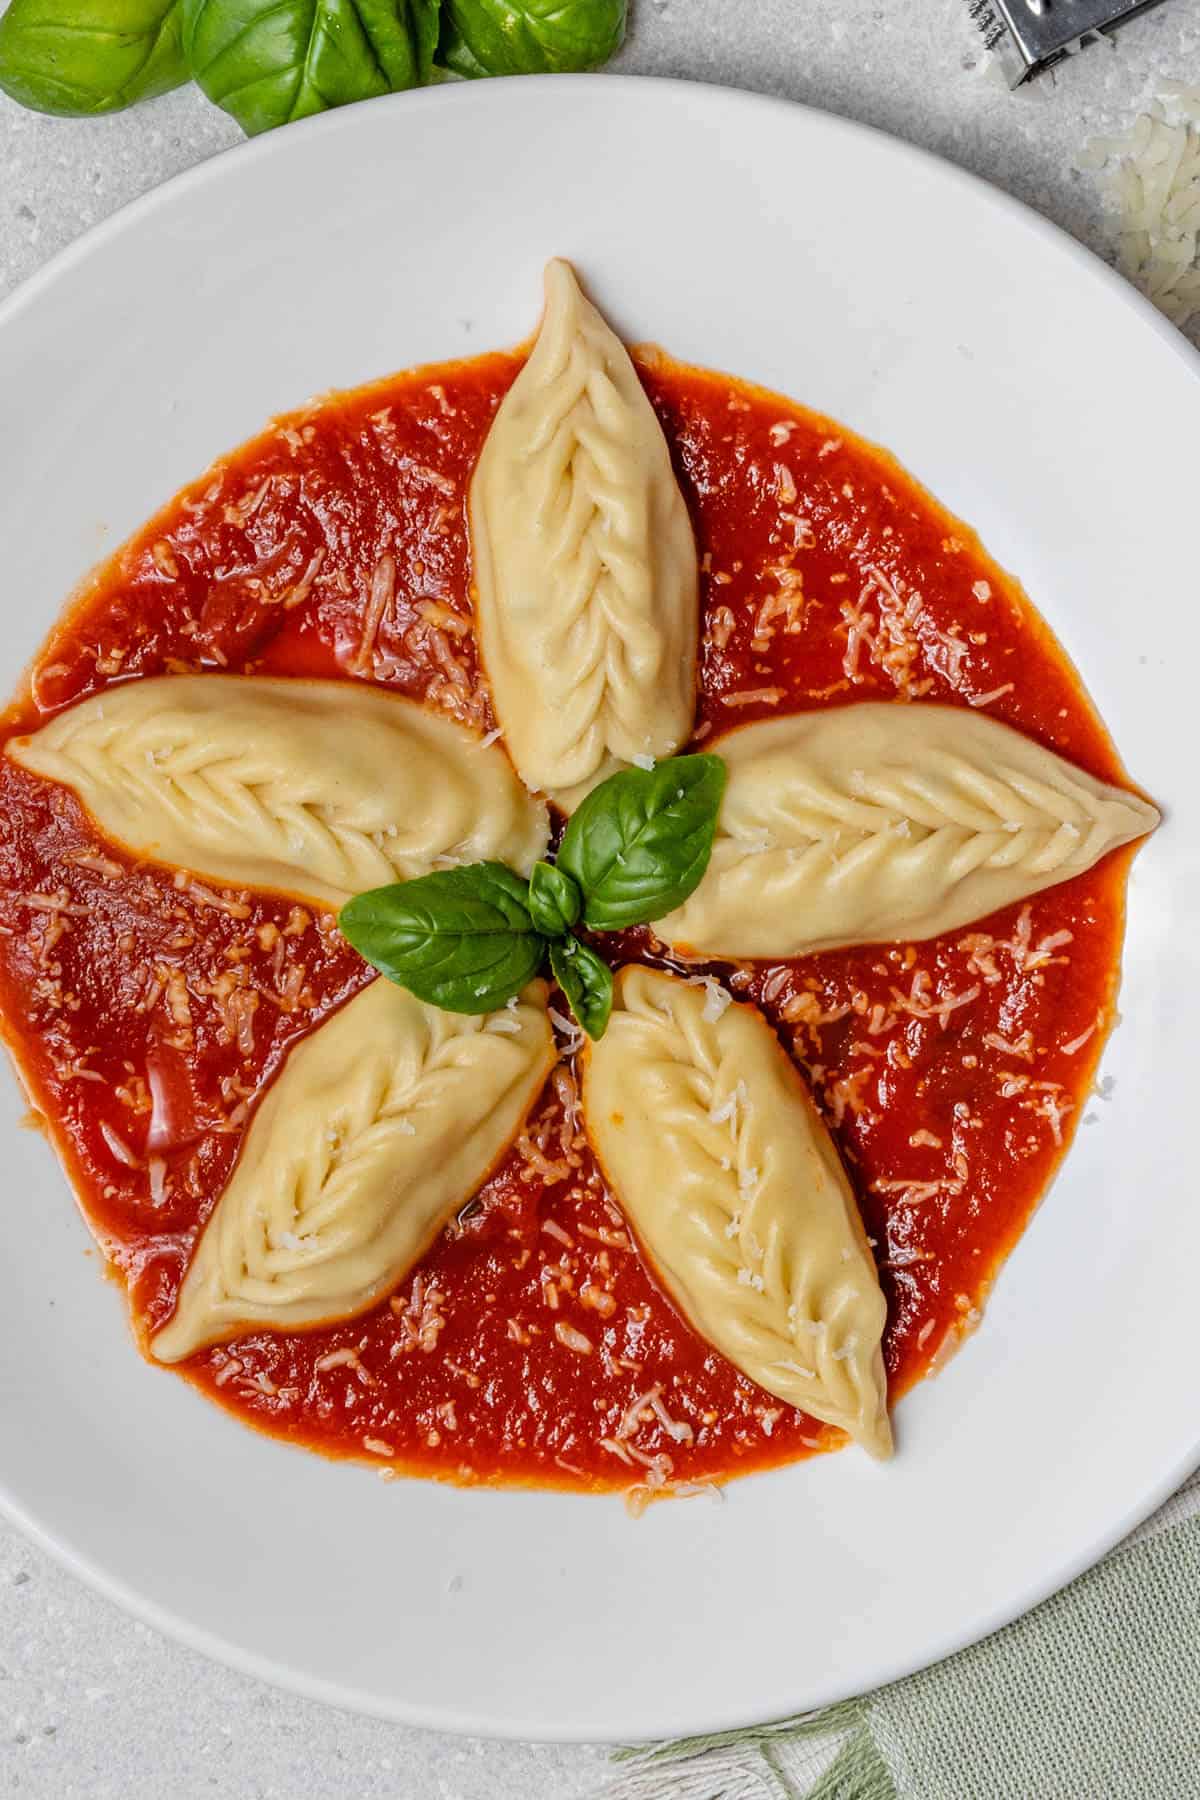
- Serve with a few spoons of cooked tomato sauce underneath. Garnish with freshly grated pecorino cheese, fresh basil leaves and enjoy!
Tips to make perfect Culurgiones
- When making any fresh pasta dough, if the dough seems crumbly, add a touch of water. If it seems too wet, add a touch of flour and keep kneading until you achieve a smooth elastic consistency
- Always keep the remaining pasta dough wrapped up or under a tea towel while making the culurgiones otherwise it will dry out and develop a crust
- Red potatoes are best as they are less watery, also don't peel them before cooking
- Always use fresh pecorino cheese! Never buy the pre grated stuff as its never as good
- Take your time and enjoy the process! Practice makes better 🙂
How to serve Culurgiones
Once the culurgiones have been boiled, the most common ways to serve them are:
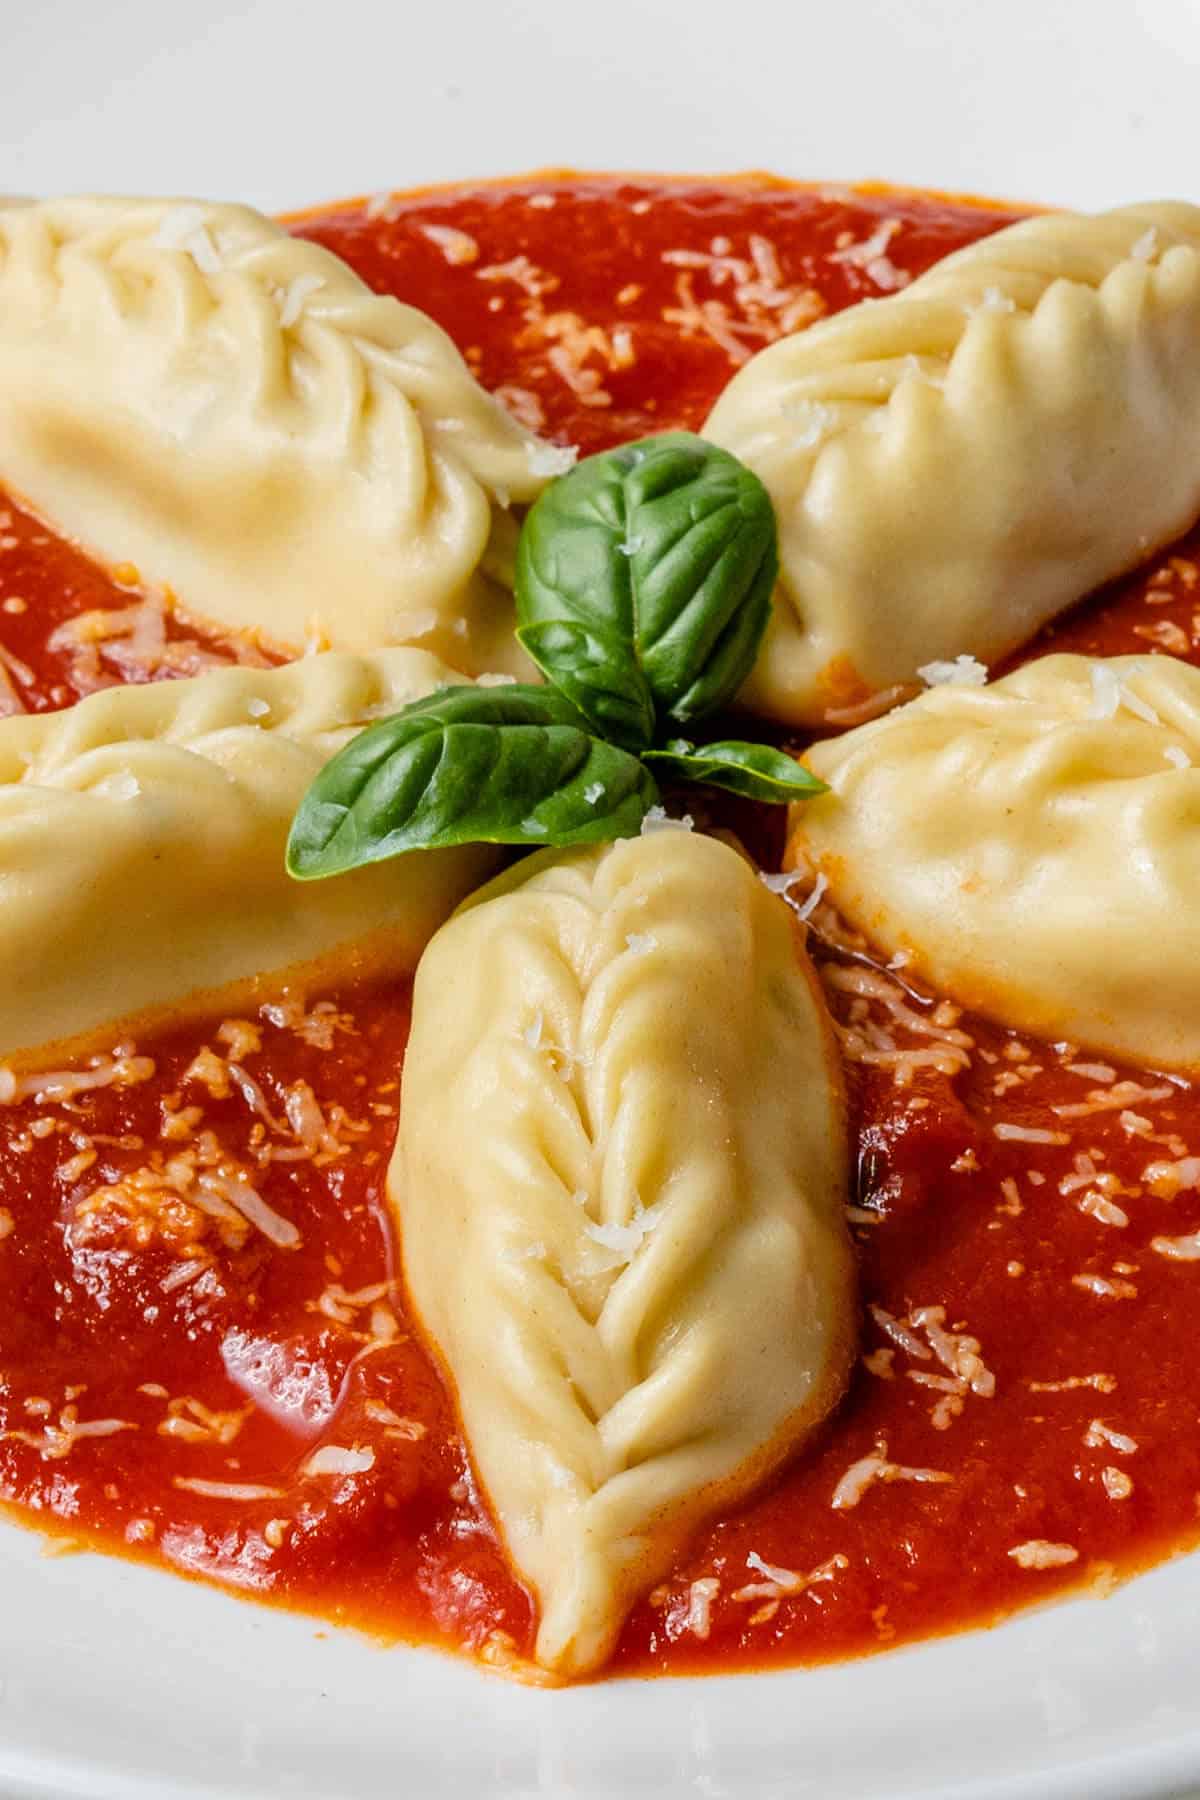
- Placed over a classic red tomato sauce with freshly grated pecorino cheese and basil leaves
- Drizzled with sage infused olive oil or butter sauce and grated pecorino cheese
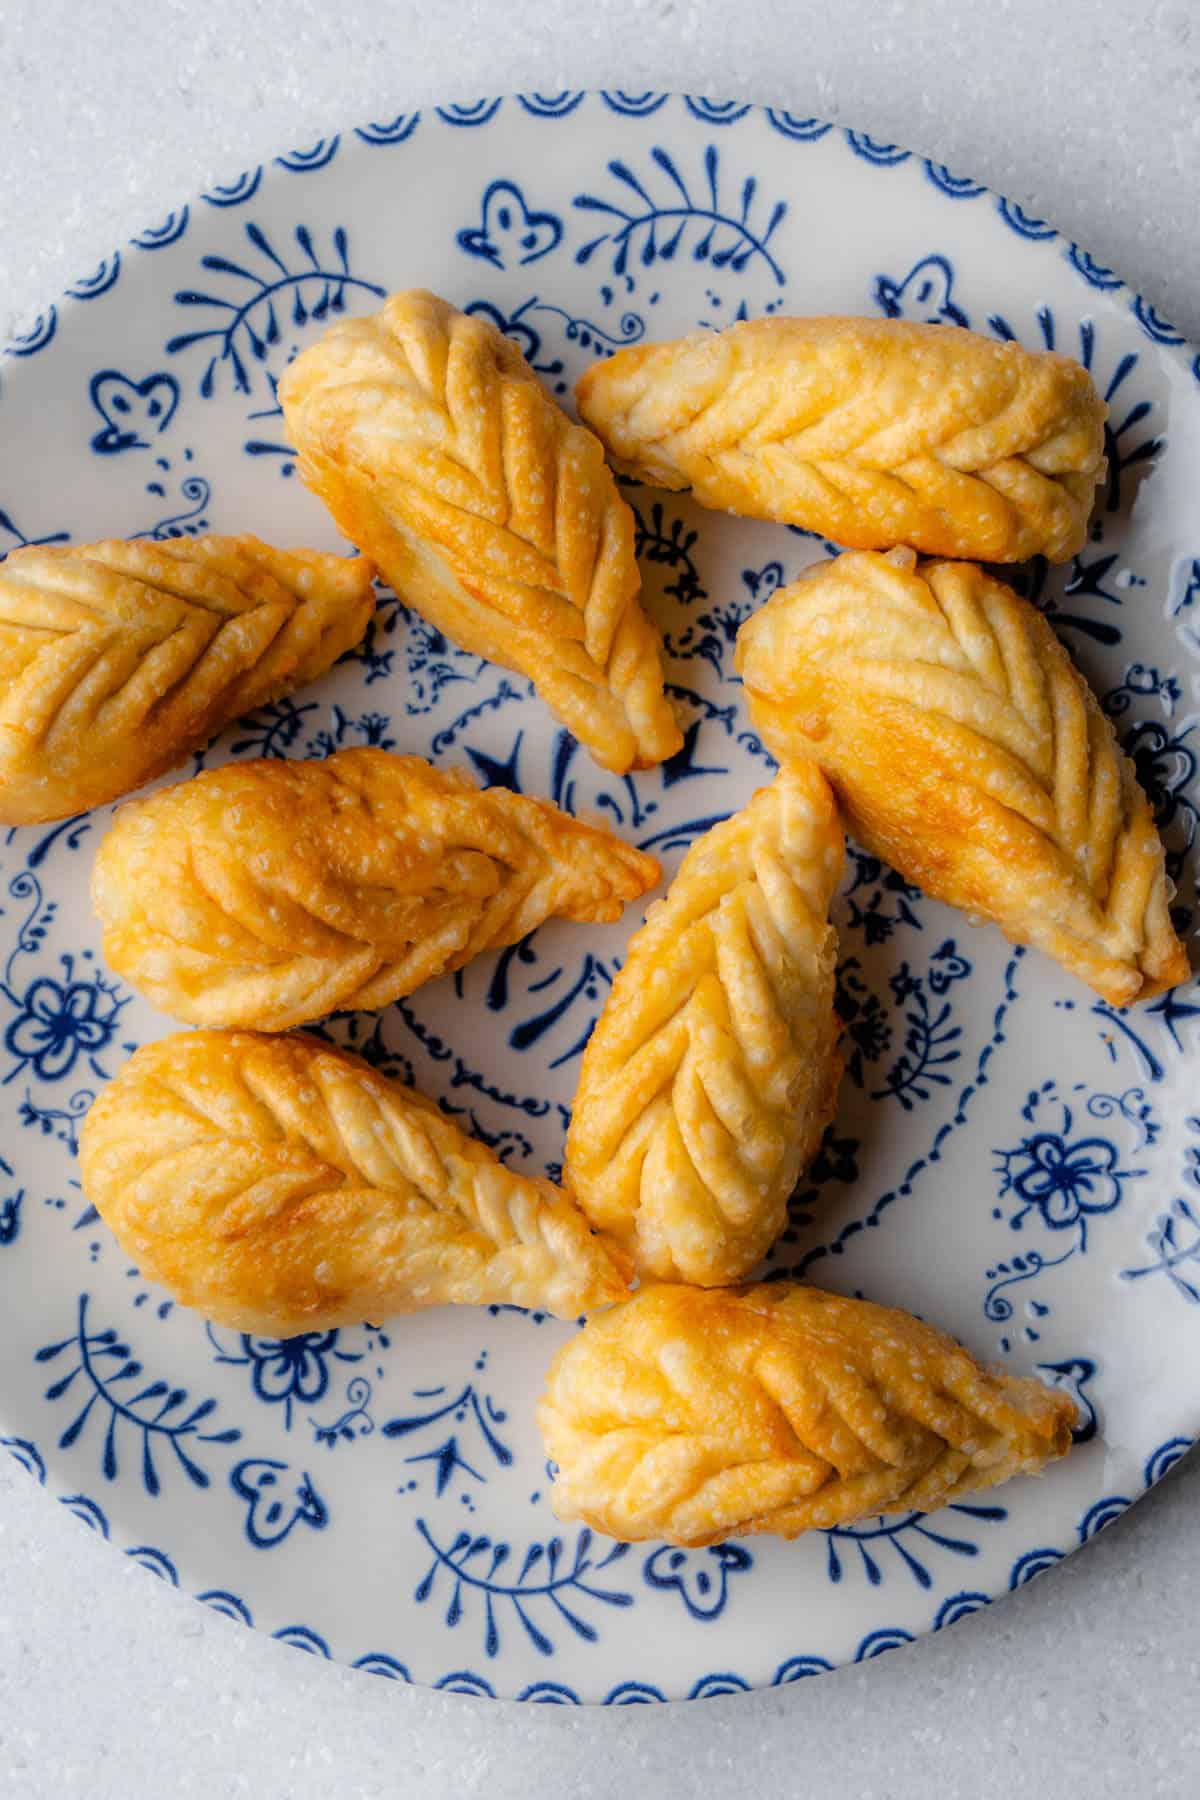
Culurgiones can also be fried! Yep you read right! When shallow or deep fried, they become super crispy and so delicious. They are great to serve as an appetizer this way and taste amazing dipped into a pecorino crema or sauce.
Storage and Reheating
- Culurgiones are best served fresh. So its best to boil the amount of culurgiones that you will be eating, then serve them with the cooked sauce. Any uneaten cooked culurgiones can be stored in the refrigerator in an airtight container for up to 3 days. Reheat in a pan with a splash of water or also in the microwave
- You can keep any of the uncooked culurgiones in the fridge for up to two days. Place them on a plate or in an airtight container with a sheet of parchment paper underneath to stop them sticking. You can also lightly dust them with semolina flour
- You can also freeze your culurgiones! Place on a tray or dish with a sheet of parchment paper underneath to stop them sticking and place in the freezer. Once they are frozen, you can place them in an airtight container or bag in the freezer for a month
More Homemade Pastas
More Pasta Recipes
- Vegan Bolognese
- Spinach Lasagna
- Lemon Pasta
- Burrata Pasta
- Pesto alla Trapanese (Sicilian Pesto)
- Pasta e Fagioli
- Pappardelle Pasta with Mushrooms
- Mushroom Carbonara
- Spicy Vodka Pasta (Gigi Hadid Pasta)
I love seeing your creations and remakes, so be sure to rate the recipe, comment and share your Culurgiones (Sardinian Pasta) photo on Instagram so I can share the love!
Recipe

Sardinian Culurgiones (Easy Steps)
Video
Ingredients
Pasta Dough
- 300 grams semolina flour
- 150 grams room temperature water
Filling
- 500 grams red potatoes (approximately 2 medium potatoes)
- 70 grams finely grated pecorino cheese (preferably pecorino Sardo - semi stagionato)
- 10 fresh mint leaves
- 2 tablespoon extra virgin olive oil
- 1 garlic clove minced
- Salt to taste
To Serve
- Cooked Italian tomato sauce (recipe below), freshly grated pecorino cheese and basil leaves
Instructions
Filling
- Boil the potatoes, ensure you don't peel them
- Once cooked, peel the potatoes and mash them in a bowl. Finely chop in the mint leaves, add the pecorino cheese, garlic, olive oil, a pinch of salt and mix to combine. Taste for seasoning
Pasta Dough
- In a large bowl add the semolina flour and slowly pour in the water, stirring it at the same time with your other hand or a spoon. Continue mixing the dough together in the bowl until it's formed together
- Transfer the dough to a clean table and knead the dough for about 10-15 minutes to achieve a smooth and elastic consistency (as with any pasta making, if the dough seems crumbly, add a touch of water. If it seems too wet, add a touch of flour)Wrap in plastic wrap or place in a covered bowl to let it rest for 20 minutes
- Cut a piece off the dough and put it through a pasta machine to roll a flat sheet (approx 1mm thickness). I usually start with a level 6, down to 4, then to level 3. Note, if you don't have a pasta machine, you can also use a rolling pinThen using a round cookie cutter 8 cm in diameter, cut out round circles
Make Culurgiones
- To form the culurgiones, take one pasta circle and place in your hand. Place a heaped teaspoon of the potato mixture in the center. Use your index finger to push the pasta gently towards the filling at the bottom. Fold the left side of the pasta over to the center and pinch it lightly to seal. Repeat with the right side of the pasta, folding it over to the center and pinching it lightly to seal
- Continue this process with left and right folds and pinching lightly to seal. At the end, pinch the tip and you will have the unique culurgiones shape.Then repeat with the remaining pasta circles and filling
Cook & Serve
- In a large pot, boil water and add a good amount of sea salt. Carefully drop in the culurgiones and cook for 5 minutes (depending on your pot size, you may need to cook in batches). They should float to the top once cooked
- Drain the culurgiones and serve on a plate with a few spoons of cooked tomato sauce underneath. Garnish with freshly grated pecorino cheese, fresh basil leaves and enjoy!
Notes
- Nutrition table does not include the sauce for serving, it only includes the pasta and it's filling
- For more guidance, please refer to the 'How to Make' section of this post for pictured steps

Comments
No Comments